import tkinter as tk
from PIL import Image,ImageTk
import os
from random import choice
import pickle
import ctypes
def get_path(root_dir,image_list):
source = os.listdir(root_dir)
for item in source:
item_name = os.path.join(root_dir,item)
if(item_name[-3:]=='jpg'or item_name[-3:]=='png'):
image_list.append(item_name)
if os.path.isdir(item_name):
get_path(item_name,image_list)
def renew():
image_list=[]
#这里是壁纸图片文件夹地址
root_dir_list=['D:\素材\壁纸']
for i in root_dir_list:
get_path(i,image_list)
try:
os.remove("image_bizhi.pkl")
except:
pass
with open("image_bizhi.pkl","wb") as f:
pickle.dump(image_list,f)
def change_pic():
#设置为全局变量
global path
path = choice(image_list)
#print(path)
img = Image.open(path) # 打开图像
size = img.size
multiple = 900 / max(size[0], size[1]) # 通过这里适当调整大小
size = int(size[0] * multiple), int(size[1] * multiple)
#print(size)
img = img.resize(size, Image.ANTIALIAS)
global photo
photo = ImageTk.PhotoImage(img) # 转化为Tk支持的格式
#这里怎么设置不了title,先不管了
global title
title = os.path.basename(path)
return path,photo,title
def set_new():
change_pic()
print(path)
#改变label的图像
image_label.config(image=photo)
image_label.image = photo
def setWallPaper():
#print(3,path)
ctypes.windll.user32.SystemParametersInfoW(20, 0, path, 0)
def destroy():
root.destroy()
#t=list(time.localtime())
#如果你不想每次退出都更新,自己设置一下哦
renew()
#没有找到就创建一个
if "image_bizhi.pkl" not in os.listdir():
print("not found and create a new one")
renew()
root=tk.Tk()
#得到imagelist
pklfile=open("image_bizhi.pkl",'rb')
image_list=pickle.load(pklfile)
pklfile.close()
# print(len(image_list))
group = tk.LabelFrame(root, padx=5, pady=5, borderwidth=5, width=1000, height=1200)
group.grid()
path, photo, title=change_pic()
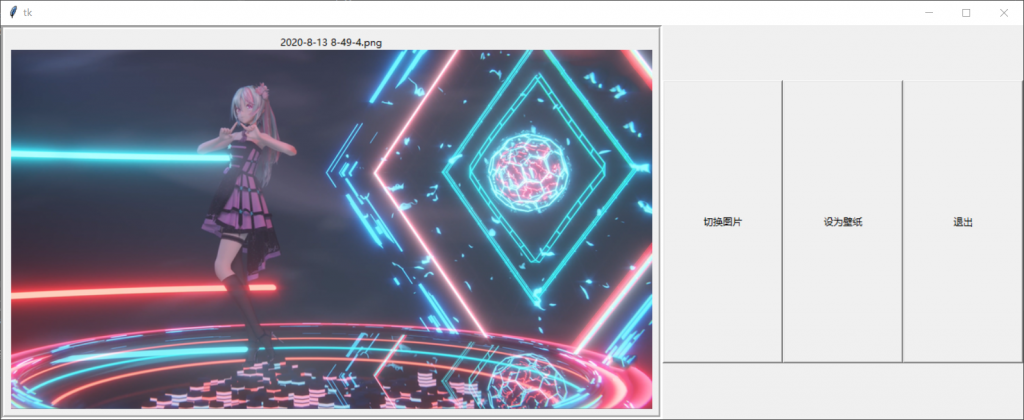
image_label = tk.Label(group, image=photo, compound='bottom') # 载入label中
image_label.grid(sticky="e") # 自动调整位置
button1 = tk.Button(root, text="切换图片", command=lambda: set_new(), width=20, height=20)
button1.grid(row=0, column=40, sticky='e')
button3 = tk.Button(root, text="退出", command=lambda: destroy(), width=20, height=20)
button3.grid(row=0, column=80, sticky='e')
button2 = tk.Button(root, text="设为壁纸", command=lambda: setWallPaper(), width=20, height=20)
button2.grid(row=0, column=60, sticky='e')
#这是全屏的代码,自行选择是否开启
# root.attributes("-fullscreen",True)
tk.mainloop()